Make Copies - Level 2
 |
The 3 – 2 – 1 RuleKeeping a copy (or copies) of your digital content is a great step towards keeping your content safe. But just in case the unthinkable happens and the original digital file and the copy become unusable in some way, it’s best to have contingency in place. The 3 - 2 - 1 copy rule offers more piece of mind that at least one of your copies will be safe. This rule is described in more detail below. |
The 3 – 2 – 1 rule is simple-
| 3 copies of each file | On 2 types of storage medium | With at least 1 copy offsite |
 |
||
In an ideal world, using the 3 – 2 – 1 rule, you will make three copies of each file you have. These copies will then be split and stored on different storage mediums, for example, one on an external hard drive and two copies in cloud storage. At least one of these copies will be held off site. In this example, cloud storage ticks this box, but if you store your content on a laptop and an external hard drive, the external hard drive should be stored in a separate location from the laptop so the two cannot be damaged at the same time.
Storing files in this way does mitigate risk to your content, but it is not always possible. As many copies as you can manage stored separately from each other is still good digital preservation.
Next Steps
Now that you have several copies of each file, your content is automatically better protected. However, it is still important to carry out regular checks on your content to keep it accessible and usable. Level 3 will tell you more about how to do this.
Make Copies - Level 1
|
Back up your content offsiteA huge range of threats can endanger your digital collections and the work that’s been put in to create them. Whether it’s computer failure, fire or flood, or simply failing to continue to pay for a cloud storage account, it’s important to not keep all your eggs in one basket. Making more than one copy of digital collections creates means your content is more likely to remain accessible. |
Just One Thing
A great way to start is to back up your digital collections to an offsite location. There are a range of ways to do this. Backing up to several external hard drives that are kept at different locations and rotated monthly is a manual approach. Replicating your content to the cloud using a simple cloud provider account is a more automated alternative but may have a higher cost.
Next steps…
Whichever method you choose, it’s critical to ensure that the backup process continues over time and that the additional copy, or copies, that you create are not forgotten about. At the next level we’ll consider how to replicate your content in a way that will mitigate all the common threats and ensure your digital collections will survive the test of time.
Control Your Content - Level 3
 |
Check Your ContractsIf you decide to use a commercial software or hardware provider for any aspect of your digital preservation work, it is very likely that you will need to sign a contract to agree to the company’s terms of service. It is important that you understand what you are signing and know exactly what will happen to your content once it is stored or processed by an external provider. |
Knowing how your data will be processed by the company is important as small print could be included within contracts that allows them to sell your contact information, or in some cases, use your content for something you don’t want it to be used for. If you are unsure, ask for help from your local or national archive who can offer advice and explain the jargon used to help to understand exactly what is being signed.
| If you sign a contract and realise it’s not what you initially thought you were signing, it can be difficult and costly to break, with some companies even charging early exit fees. Taking the time before you sign to understand all the clauses clearly will greatly reduce the risk of issues arising in the future. | 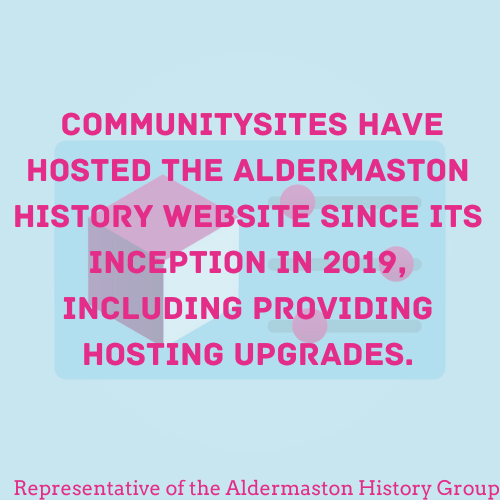 |
Control Your Content - Level 2
|
How to talk to SuppliersIf you are considering using any kind of software, system, or service to help you preserve and provide access to your digital collections, you need to make sure that you know what you need. Being able to talk to suppliers or creators will allow you to ask the right questions to make sure you get the most out of each conversation and ensure you get the product that is right for you, regardless of whether the software is free to use or paid for. |
The approach we recommend here is to take a holistic view of how you would like to manage your collections and what technological solution would enable you to do that. Considering the points below will help you to do this.
These points are broken down by the stages of the lifecycle to help you work through each step of your process and work out what is required.
Creation / Collection
|
Selection –
|
Description
|
Management –
|
Storage –
|
Preservation –
|
Use –
|
|
| Knowing what you need, what is a deal breaker and what are “nice to haves” will help your conversations with suppliers go smoothly and ensure you choose the right product for you.
Make sure you follow the advice in level one and don’t put your content anywhere that you don’t fully understand how you will get it back if you need to. |
|
Control Your Content - Level 1
|
Exit StrategyHaving your digital collections locked into a particular system, app, service, or website can be a huge risk. Especially if that system or service is closed down, or you simply want to move it elsewhere. A common example is the use of Facebook groups by community organizations. They are relatively easy to setup and engage an audience, but if digital photos and other information is collected on a Facebook group, it’s very hard to extract that information so that it can be shared or preserved elsewhere. |
It is therefore critical ensure that any software, system, or website that you use has a clear exit strategy that details how you will get your data back if you decide to stop using them.
Just One Thing
If you decide to use a system to manage, preserve, or provide access to your content, make sure you understand the process to get your information back. This information should be included as part of any contract you sign. If it is not there, do not sign the contract and reassess your options.
Next steps…It is important to verify that you can successfully extract content before committing to using a particular system. Level 2 will explore how you can do this, what to look for as an adequate exit strategy and how to document it. |
|
Keep Your Content – Level 3
 |
Storing Your ContentNow that you know what storage you currently have, and you know your options, it makes sense to look at what your current storage requirements are and how they might grow over time. Information gathered in your Digital Asset Register can help with this process. It will enable you to look at the best storage option for your content and put a plan in place to move your content should you ever have the funds and resources to do so. |
| Comparing the outcomes of your storage review against the pros, cons and specifications of the options you read about in level 2 will help you to choose the right storage option to suit your circumstances. Levels one and two of the ‘Control Your Content’ will also be invaluable here as you should work on the same principle of being able to access and easily move your content from anywhere you store it. Talking to suppliers will also be of use in this exercise as it will help you make sure your chosen system does what you need it to, and you are aware how the system works before you purchase. Further information about each storage medium can also be found online. | 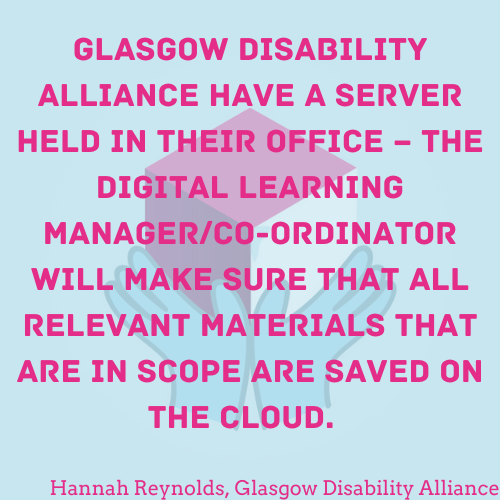 |
Keep Your Content – Level 2
|
Storage OptionsNow that you know the storage you have is functional and accessible, it is worth looking into what options you have for long term storage of your content and any copies you make. Technology is constantly changing and researching the options currently available could not only save your group money but may also lead to a more suitable storage solution for your content. Some of the storage options currently available are detailed below along with some pros and cons of each. |
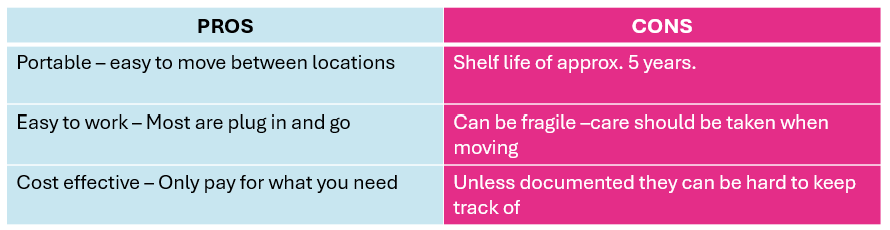
External Hard Drives
External Hard Drives are the same storage drives used inside laptops and desktop PCs, but they are encased independently and connect to a computer via an external connection, usually USB cable.
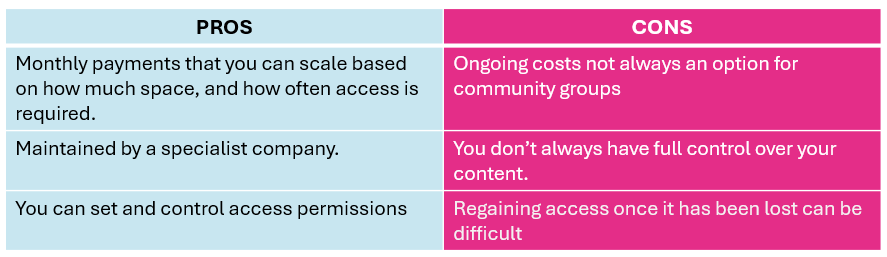
Third Party Cloud Storage Provision
These involve paying a fee (usually monthly) to a third-party service provider, to send copies of your digital content over a network. The provider may also maintain backups for you as part of the service.
Network Attached Storage
A NAS is a storage device connected to a network that allows storage and retrieval of data from a central location, usually on your premises. You can control access permissions to further protect your content.
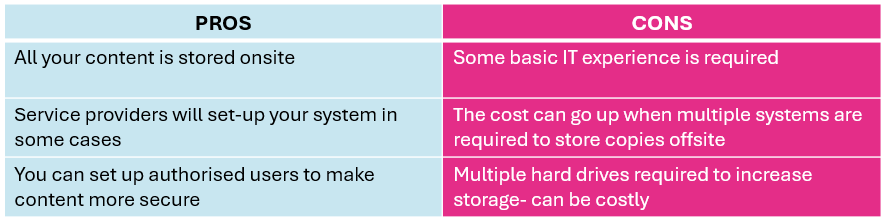
Next StepsNow you know what storage you have, and what your options are, it makes sense to work out what storage you need and how you go about putting this in place. Level 3 will help you work out your storage requirements which will help you choose the right option for your group. |
|
Organise Your Content - Level 3
 |
Using a SystemA file management system (FMS) is software that helps organisations store, organize, and manage electronic documents and files. FMSs can be used to store a variety of files, including text documents, images, videos, and contracts. These systems can help you improve accessibility and security, make information easier and faster to retrieve, and they can be more secure than paper or physical filing systems. |
When choosing an FMS, it's important to consider the needs of the users, including their preferences as well as their requirements. Some things to consider include ease of use, accessibility, language options, and user interface.
Cloud storage systems such as Google Drive or Microsoft 365 can be used as file management systems as well as content storage areas, which will save on costs. It is important to make sure that the system you choose does everything your group needs it to do. Level 2 of Control Your Content will help prepare you to have conversations with file management providers to help inform your choice.
|
File Management Systems are not a necessity, and you may choose to manage your content using lists and file explorers on your own storage. For more information on naming conventions, file structure and file management systems, see the Organise your content section of the ‘What Next?’ document. These additional resources will provide more information and examples you can learn from. |
 |
Who Does What - Level 2
 |
More Detailed Roles and ResponsibilitiesA basic list of the roles and responsibilities within your group is a useful tool, but the more information you can provide to those who may take over in the future, the better. |
In addition to the tasks and responsibilities you documented in level one, you may also want to think about adding,
-
A secondary person responsible for each task (should the first become unavailable).
-
A section to your document that includes password information for any systems and software used. Passwords need to be secure, but when working as part of a group, more than one person must have access to passwords to ensure no data or access is lost. Password manager software is also available as a more secure option.
-
An annual review date to make sure any changes are logged and dealt with in a timely manner.
It is also important to make sure that this document is available to others within your group. Many community groups don’t survive due to a single point of failure.
Next Steps
Now you have a full roles and responsibilities document in place and accessible to your group, it is important to regularly review the document to keep it up to date and relevant to your work. Level three provides more detail on how to do this.
Who Does What - Level 1
|
Roles and Responsibilities - on a pageIt’s essential to have clear roles and responsibilities when working with digital content. By agreeing and documenting the roles and responsibilities within your community group, you can avoid duplicating work, enhance teamwork and effectiveness, and (perhaps most importantly) ensure that any critical activities are always addressed. Staff or volunteers will come and go, and it is important that key responsibilities are understood by all and passed on to someone who can continue to carry them out. |
Community groups have historically been good at ensuring some of these key roles are addressed. For example, having a chairperson to give overall leadership and direction or having a Treasurer to ensure someone is responsible for managing finances. In the digital age, there are new and critical responsibilities that should be addressed. These include:
-
Performing backups of digital collections
-
Paying for website hosting
-
Ensuring documentation is up to date
-
Making sure cybersecurity is addressed
Just One Thing
Simply document your key tasks, and who is responsible for them. This is a powerful way of managing the effectiveness of your group over time.
This template will help you to do this.
Next steps…
An annual review of roles can ensure that this information remains up to date, relevant and effective. The next level provides a more detailed guide to managing your group’s responsibilities, knowledge and skills.
Subcategories
Template for building a Business Case
This section provides guidance on the content that will be useful to include in your business case, but it will likely need to be adapted to the structure used in your organization’s template.