Working with the Command Prompt
On this page we will have a look at some basics of how to use the Command Prompt. We will be walking you through how to open the Command Prompt and some of the basic commands you can use. This will help you become familiar with using the interface. Whenever a command is shown it will be written in italics.
To get the most from this guide, we recommend opening and working along with the instructions using the Command Prompt on your own computer. For each command we will give you clear instructions and information on what is happening.
Opening the Command Prompt
 The Command Prompt is easily accessible through the main Windows menu available at the bottom left of the screen. There are two methods for locating and opening it:
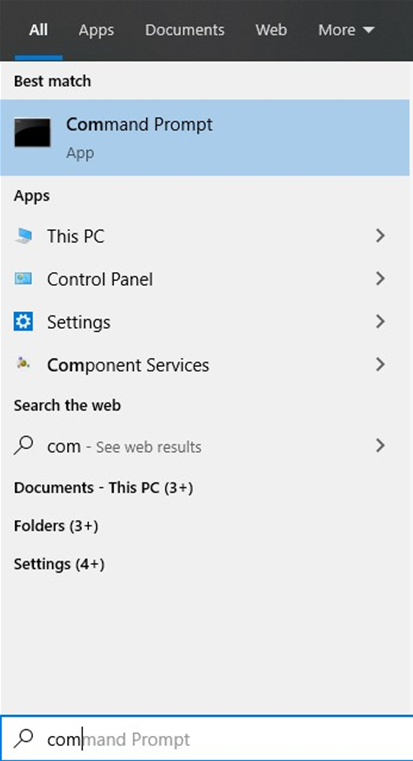
Finding via a Search (left)
- Click the Windows Menu icon
- Start typing “Command Prompt”
- Click on the App listing that appears
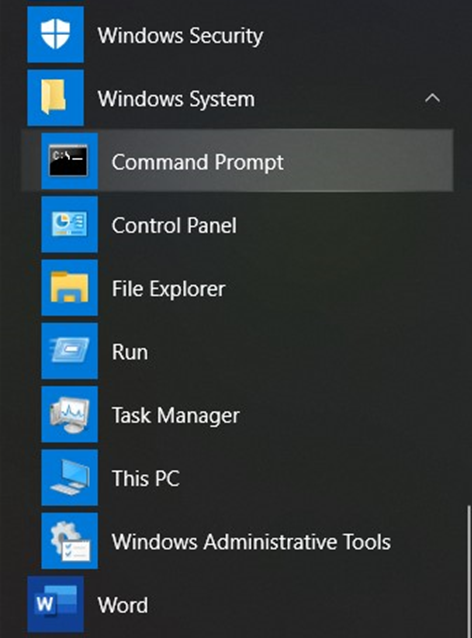
Navigating Through the Menu (right)
- Click the Windows Menu icon
- Scroll down and click on “Windows System” Folder
- Click on “Command Prompt” listing
First View of the Command Prompt

When the Command Prompt first opens there are only a few lines of text on screen. They are the computer’s operating system (Microsoft Windows), the version (Version 10.0.18363.1016 in the above example), and a copyright declaration.
The next line is the command line where we can input our commands. The default is to start in the main folder for the user profile we are using. In the example above we are in the C: Drive in the sharo folder, which is a sub-folder of the Users folder. The current folder location will always be followed by a “>” symbol, this is where our commands will be entered.
As we begin to enter commands there are two important things to remember:
- Commands are not case sensitive
- We need to use a backward slash (\) for file locations and not a forward slash as we would with website addresses (/)
Moving Between Folders
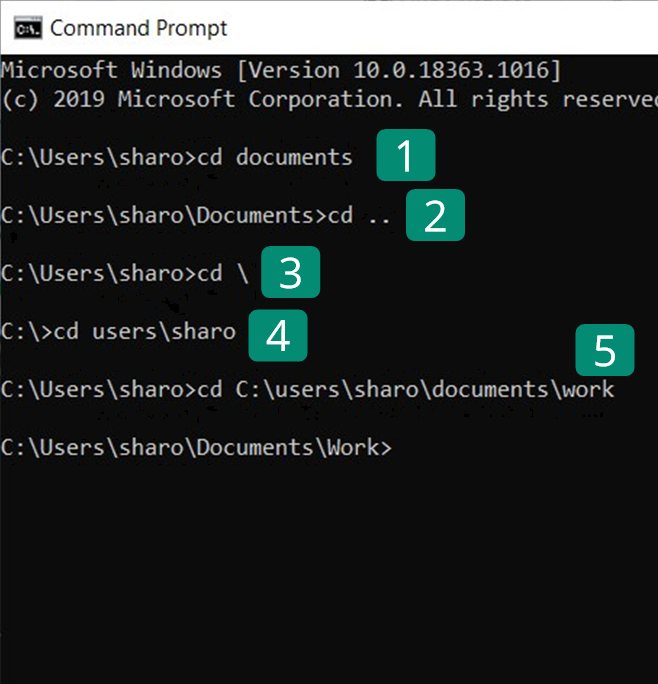 The first useful basic command we will use is for moving between different folders. The command to do this is “cd” (change directory). The image on the right shows five examples of the syntax that can be used for this command to make different moves. In each case the following line shows the file path for our new location in the folder structure. The five examples are:
- cd folder name – to move to a sub-folder of the current folder e.g. cd documents
- cd .. – moves to the folder above the current folder
- cd \ – jumps to the top level of the current drive
- cd folder name\sub-folder name – moves two levels down in the structure to the named sub-folder e.g. cd users\sharo
- cd file path – you can also type the full file path for the folder you wish to move to e.g. C:\users\sharo\documents\work
Using the Command Prompt you opened earlier try out each of these commands to move around the computer’s folder structure.
Viewing the Folder Structure
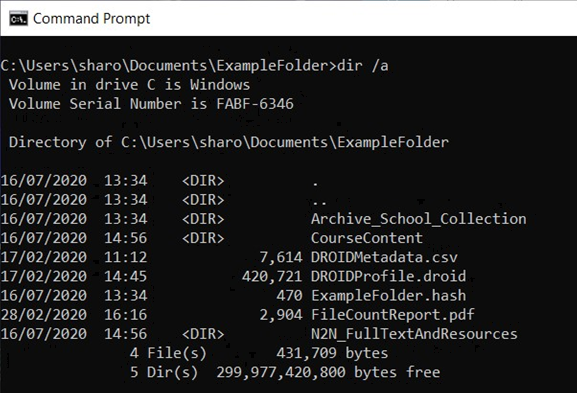 When navigating the folder structure in the Command Prompt it would obviously be useful to be able to view that structure. The examples on the left show two options using the dir and tree commands.
dir Command (top)
Using just the dir command will show information about the current directory and the files and sub-folders it contains one level down. Folders are indicated in the list by <DIR>.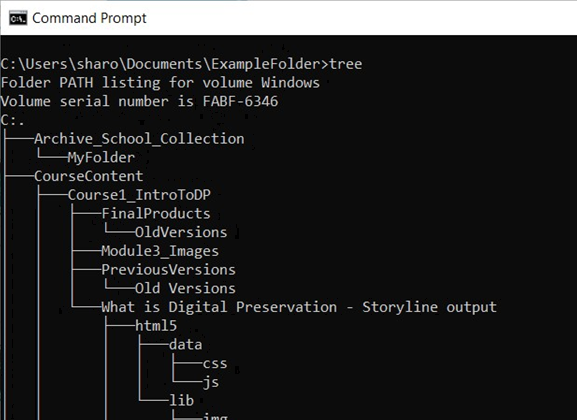 tree Command (bottom)
The tree command will display a tree diagram of all of the sub-folders contained below the current folder. As this includes all levels below this tree can lengthy for large/complex folders.
Now use your open Command Prompt window to try out the dir and tree commands and examine the results.
Renaming a File or Folder
The rename command will allow you to rename files and folders. When renaming objects in the current folder the structure of the command is as follows: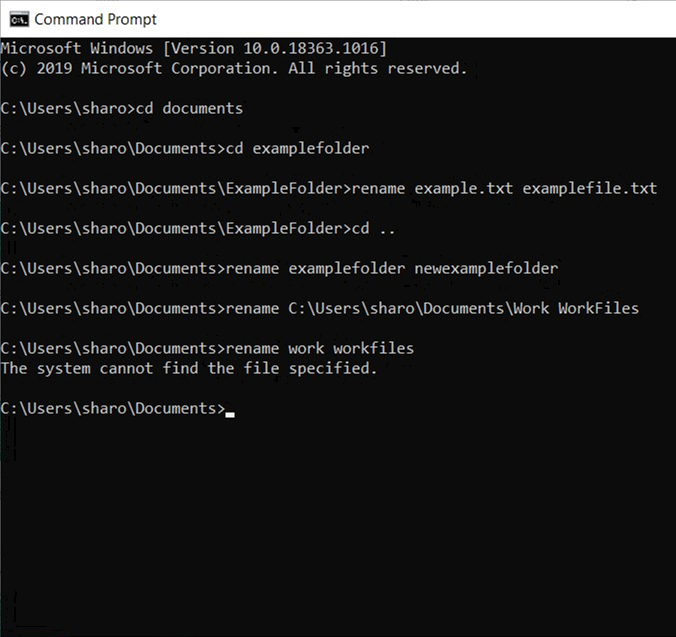
A File: rename [current file name] [new file name] – the file extension must be included e.g. rename example.txt examplefile.txt
A Sub-Folder: rename [current folder name] [new folder name] - e.g.
rename examplefolder newexamplefolder
If any of the names contain spaces they must be enclosed in quotation marks, e.g.: rename “example file.txt” “new example.txt”
Also, it is possible to rename a file or folder not in the current folder by including the full file path with the current name, e.g.:
rename C:\Users\sharo\Documents\Work WorkFiles
Now try these out yourself, but avoid using important files or folders in case of mistakes! The image on the right shows the examples listed above, note that a result is only shown if there is an error.
Accessing Information on Available Commands
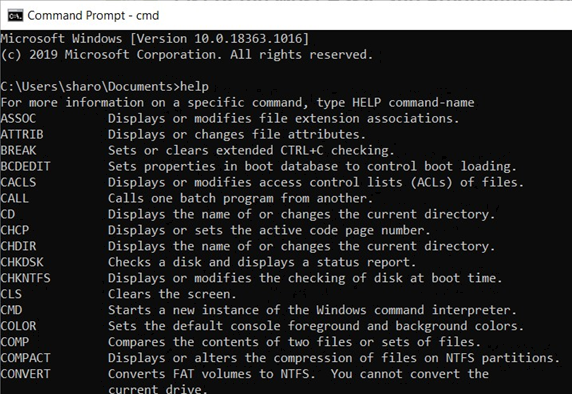 We have now looked at a few of the basic commands that can be used in the Command Prompt. If you would like to try others you can access a full list of default commands on the Command Prompt itself. You can also get information about the syntax that should be used for each command.
List of Default Commands:
help (see top example)
Information on a Command:
help [command], e.g. help dir (see bottom example)
On other pages in this section we examine how to use the Command 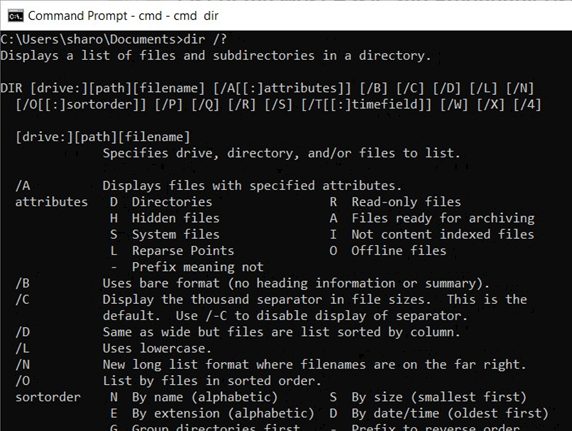 Prompt for two tasks that can help with Digital Preservation work: creating a directory listing and copying files.